
AI to HDRI

This is a project aimed at using AI and algorithmic post-processing to create panoramic high dynamic range (HDR) images for use as lighting in 3d/CG renders.
Please note, this project is still in development and at this time models and scripts are not available publicly. Feel free to reach out to me with any questions, insights, or requests.
A brief summary:
A fine tuned diffusion model (based from Stable Diffusion v1.5) was created by training on a data-set of more than 200 panoramic, HDR style, images. This model allows the generation of original and unique panoramic SDR (8-bit) images that can better fit specific lighting scenarios when rendering CG/VFX work.
These images are then analyzed and post-processed using Python Pillow and Netpbm to generate luminance data at 32-bit depth, creating a HDR image that can actually provide relevant and realistic lighting to a scene.
A more thorough breakdown of the process is further below.
Model Output Examples
Below are some outputs from both txt2img prompts as well as img2img prompts. At this time txt2img is fairly consistent and creates usable results, however img2img is in early stages and will need further work as seen in the generations below. Each generation is followed by an interactive 360 viewer of the image.
TXT2IMG
Indoor empty warehouse with overhead lighting and a forklift

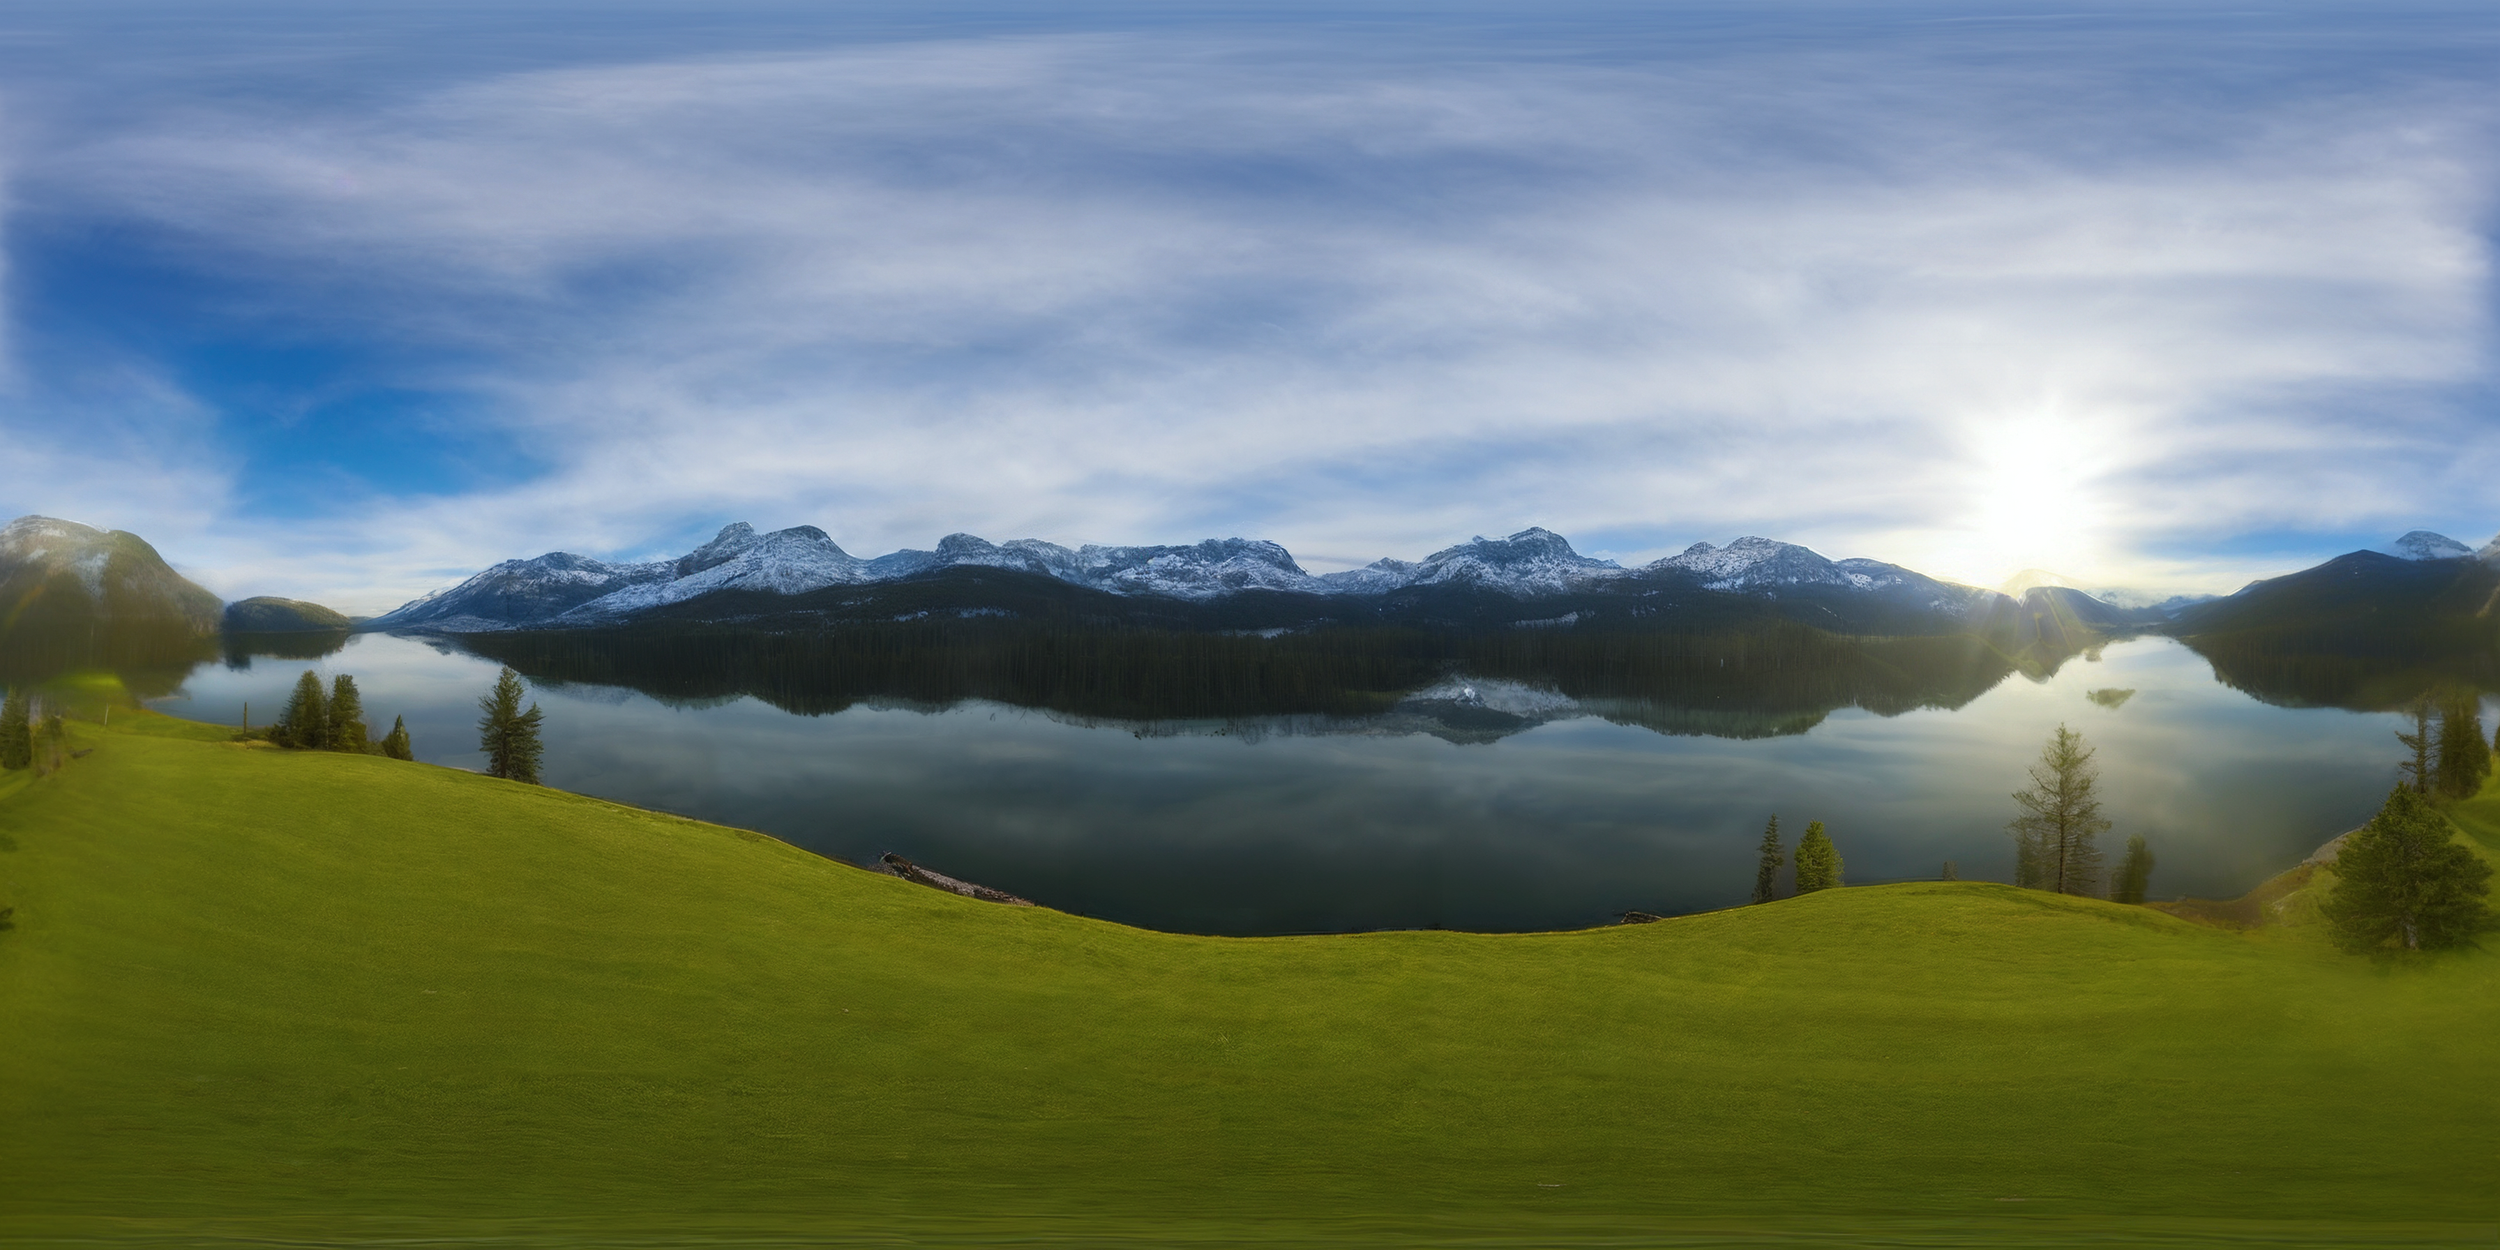
Outdoor sky with grass and a lake, snowy mountains in the background, late afternoon sun

Indoor studio apartment room with a sofa and a bed and a television, framed abstract art on walls, small room

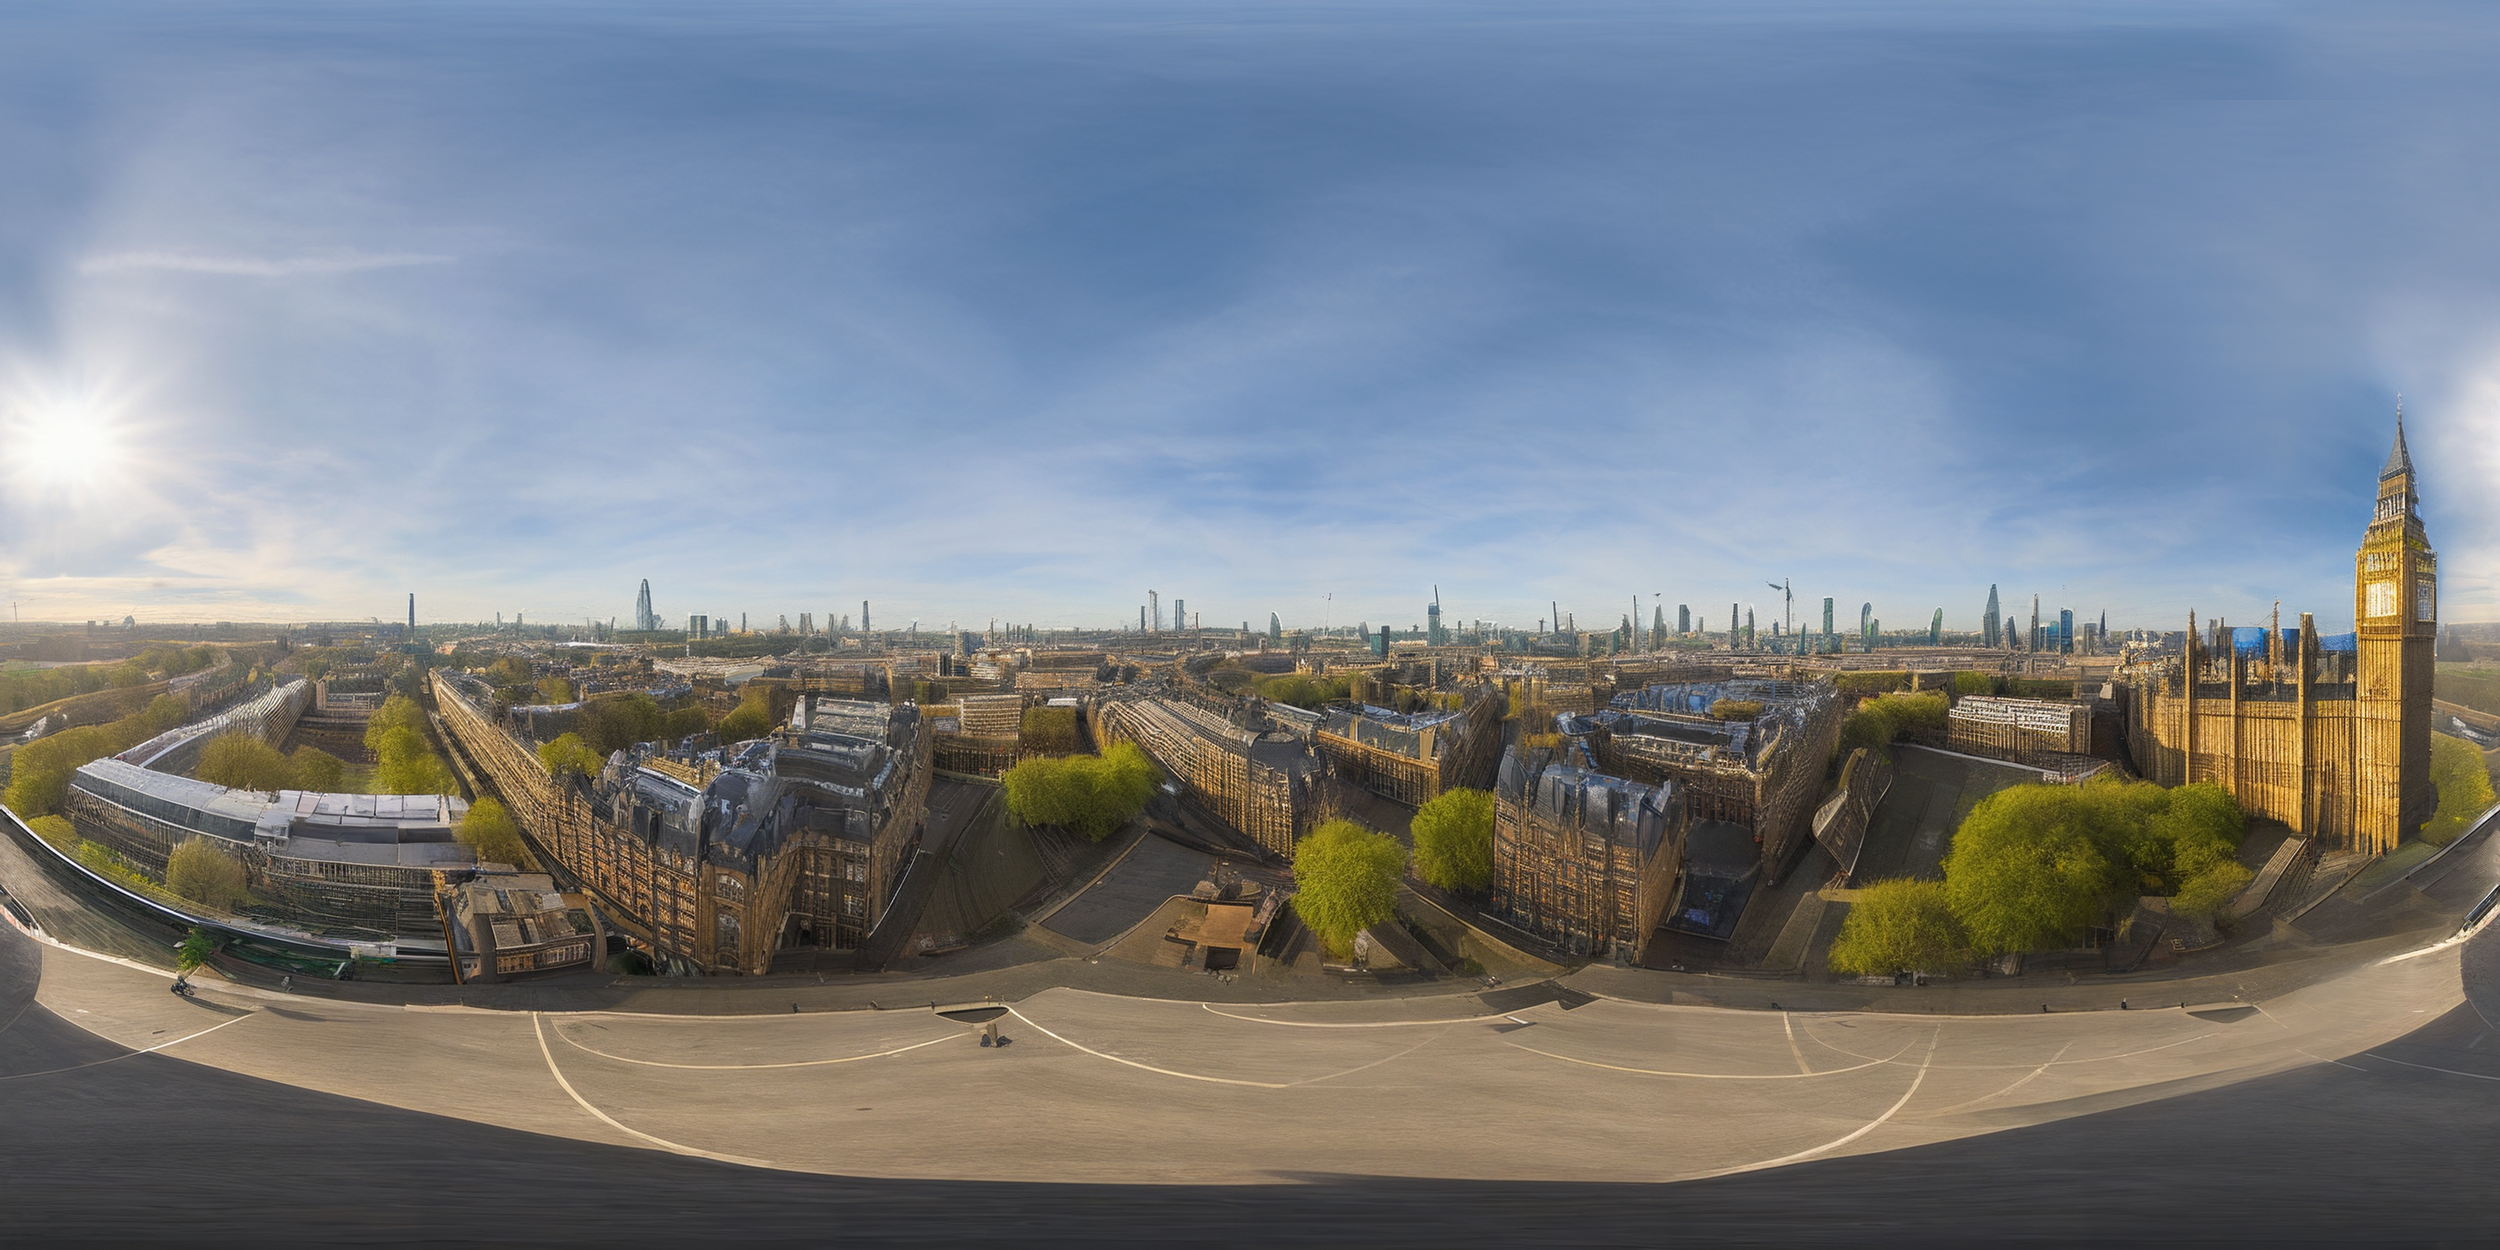
Outdoor view of London from a rooftop, clear sky
IMG2IMG
Outdoor Cell Phone Image Used as Source


Result SDR panorama
Indoor from Stock Photo of a Modern Bathroom (Photo by Quang Nguyen Vinh from Pexels)


Result SDR panorama
Let’s See Some Renders
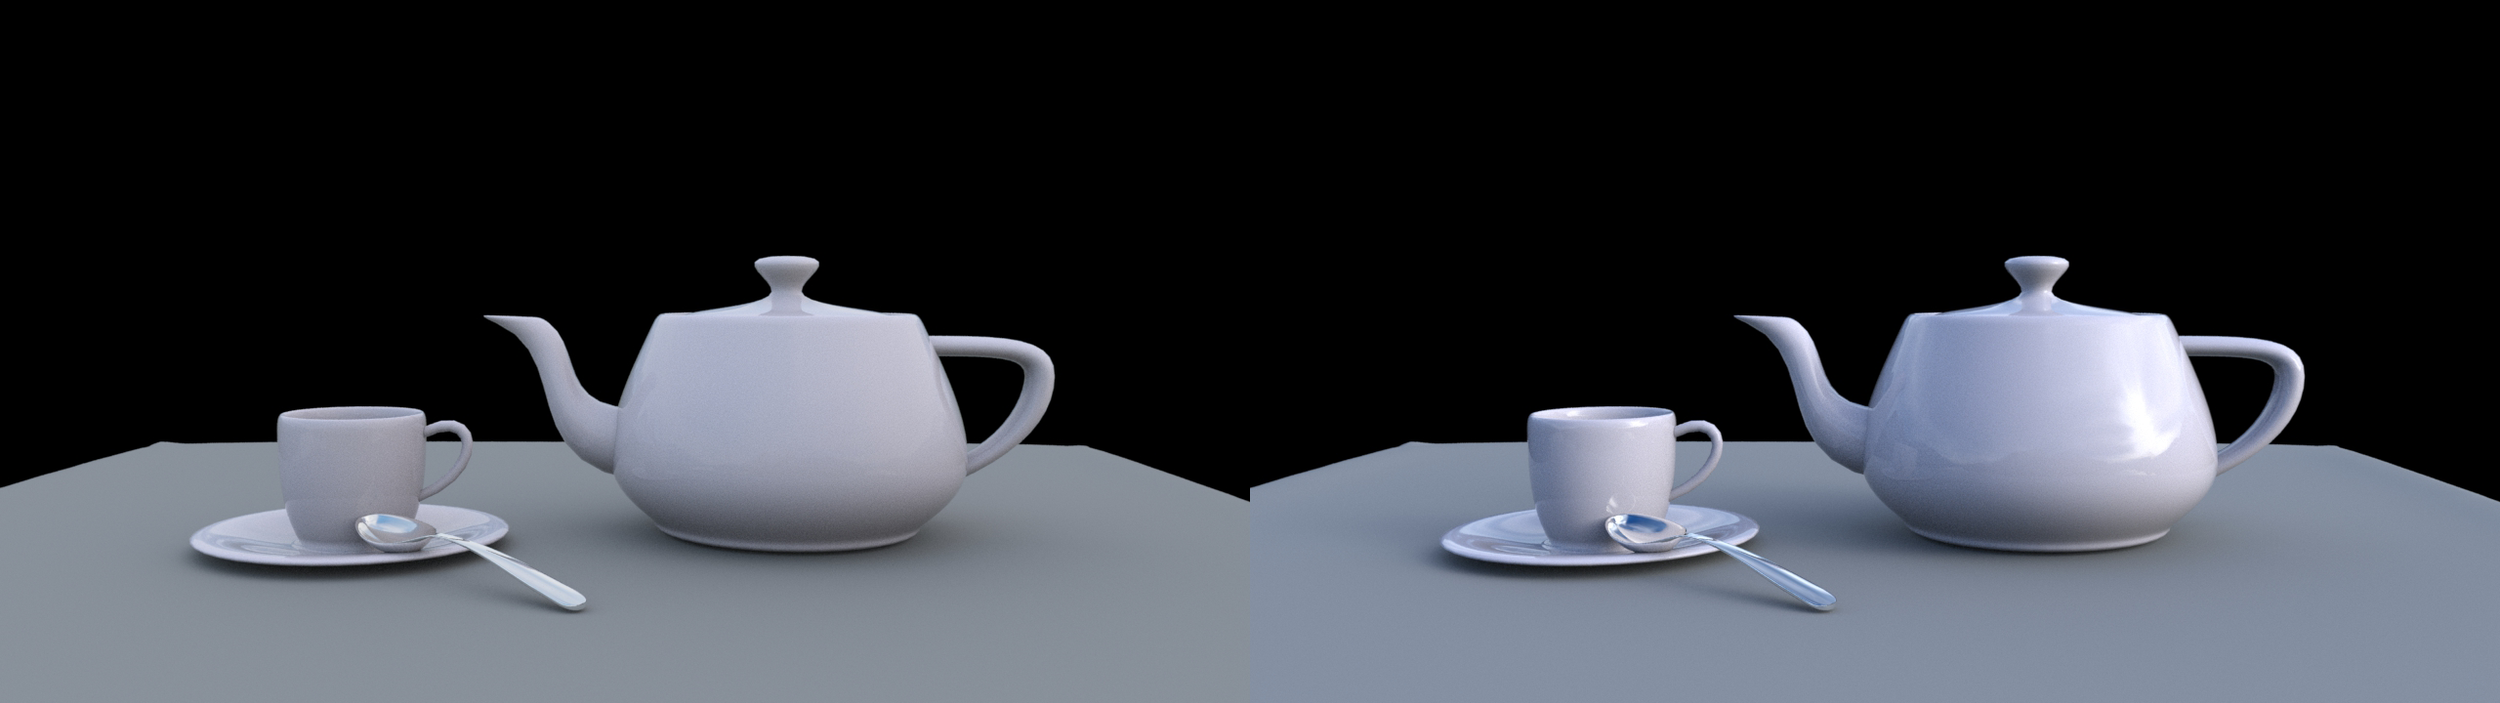
So the big hurdle with creating HDR light domes using AI models, is output images are limited to 8-bit color depth. For useful lighting purposes we like to use 32-bit HDR files in order to properly represent light sources and range of luminance.
Below are renders demonstrating the drastic difference between the SDR and HDR result images. All of these renders are using the panoramas generated above, before and after algorithmic post-processing using Netpbm. This process is described further below.
All renders are the exact same scene, no adjustments to shaders, renderer, or lighting, other than changing out the dome. Left is SDR, right is HDR.

Empty Warehouse
Mountain Lake

Studio Apartment

London Rooftop

img2img Field at Sunset
A More Thorough Breakdown of the Process
This process began by training a fine tuned model using Stable Diffusion v1.5 as a base. The version demonstrated above was trained on 215 HDR-style panoramic images gathered from the internet as well as from my own mirror-ball HDR composites.
This version was trained on a single NVIDIA A100-SXM4-40GB card for 3.5 hours at 20,000 steps. Training rate was gradated from 0.005 to 0.00001 as it progressed.
I attempted multiple versions training on cropped panoramas at 512x512p as well as horizontal squashing from 1024x512 to 512x512. Best success was found training on compressed images read at 512x256, stretched to 512x512.
The only trigger words directly built into the model are “env-pano style” which triggers the base image layout, as well as “indoor” and “outdoor” which serve as pointers just to start the generation in the right direction.

An unprocessed grid of an Indoor living room with big windows, beige sofa, house plants
Image generation in my testing was then done at 1024x512 before any alterations were made. Results, in general, make a solid attempt at being seamless/tile-able horizontally, however more work is needed in order to smooth out the imperfections and avoid any hard lines.

Left: Offset image prior to in-painting - Right - Offset image after in-painting
Using Python Pillow, generated images are offset and wrapped 512 pixels horizontally (halfway). Then a mask is automatically applied and sent through two in-painting passes before being offset back to it’s original position.
The image is then sent back into the original model as an img2img generation, and upscaled to 3072x1536 using an ERSGAN model from NMKD, 4x_Superscale. The upscale resolution is not limited, however 3072x1536 was chosen as a good balance between speed and quality.
Now we have a reasonably high resolution, seamless, Standard Dynamic Range image at 8-bit depth.
Mountain Lake Example
Moving from 8-bit to 32-bit seems to be a bit of a magic trick of creating data that doesn’t exist. Simply converting files from one container to another will, in most cases, actually degrade the image further and leave massive holes of missing data.
Since our end goal is to create HDR light maps for use in 3d rendering, we have no need to try and create additional color data, this 8-bit image is actually plenty to provide a reflected environment and light-color variation. Our main focus is creating an accurate light source that is only seen in HDR containers.
All of the following could be done manually, and perhaps would gain a small amount of accuracy, but at this point is done automatically through Netpbm scripts.
First, two .pfm file containers are created holding the original image, a Portable FloatMap works great for building completely uncompressed, raw binary 32-bit images, and also was chosen to work smoothly with Netpbm for pretty straightforward manipulation. In our first .pfm, the highlights are clipped and the contrast and saturation are increased. This is mainly a visual adjustment, to accomplish pseudo-HDR tone-mapping and help our final product look more cohesive in bright and dark areas of reflection.
Our second .pfm file is then processed to isolate the most luminous pixels of the image, discarding errant points that aren’t part of a general cluster, and creating a mask that estimates possible light sources.

Mask Created for Mountain Lake Example
This mask is interpolated across the 32-bit structure in the Luminance channel, then combined with the other tone-mapped image and saved into a .HDR file. This creates a fairly wide range of possible exposures, similar to highlight data from a camera shooting RAW.
All that’s left now is to import the .HDR file into your scene, adjust your exposure as needed, and hit render.
Created by George Arnold (2023)
As mentioned above, models and scripts are not publicly available at this time as this is still being developed further. However below I have made available a couple of HDR files from the examples. Do not hesitate to try them out or to reach out with any questions or insight.
Get HDR Files Here
(These files are provided for research purposes and are not meant for commercial use or re-hosting/re-uploading. CC BY-NC-SA)